Replacing wood trim with aluminum
This article is another instance of documenting some past work. While I do enjoy woodworking, wood exposed to the elements requires quite a bit of maintenance … and I’m lazy. For this reason, I’m not a huge fan of wood trim on the exterior of boats.
About a year back I was getting rid of some blackout roller shades and noticed they were weighed down with 3/16 aluminum flatbar. I kept the flatbar, you never know. It’s only a bit later that the dots connected: I could replace my wood trim with aluminum!
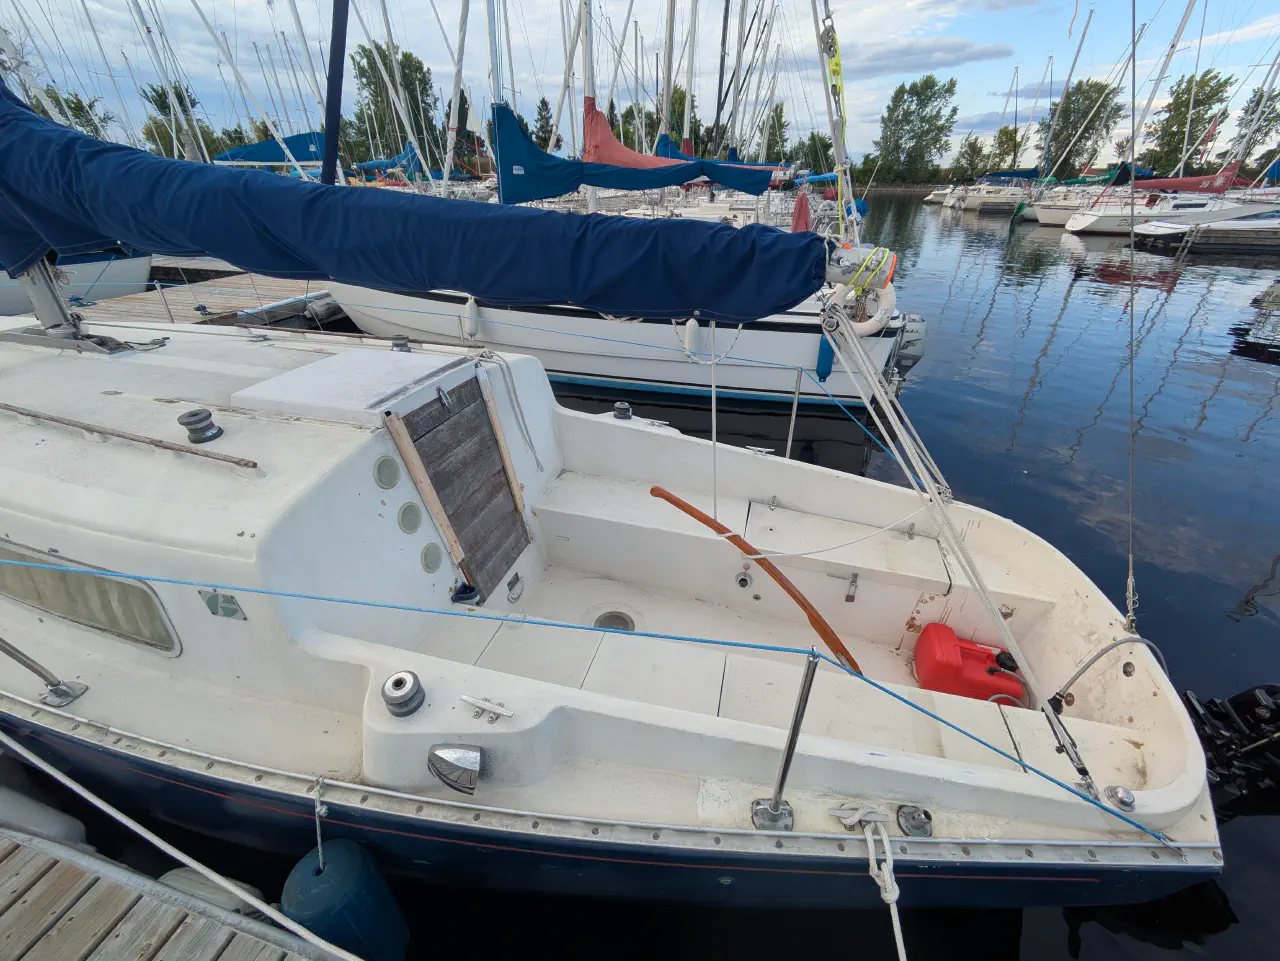
Overall the process is simple: rip out the teak, replace it with flatbar. I had to replace four pieces, the two horizontal strakes retaining the companionway hatch and the two vertical bars retaining the companionway washboards.
The real challenge was going to be mounting. Grampian simply mounted the trim using wood screws directly into the laminate along with some glue which had long dried out. I was hoping for something a bit more serviceable and settled on helical coil inserts. The game plan was to enlarge the holes that were left by the original fasteners. Speaking of fasteners, I elected for some 316 countersink machine screws. (We’ll talk about galvanic corrosion later.)
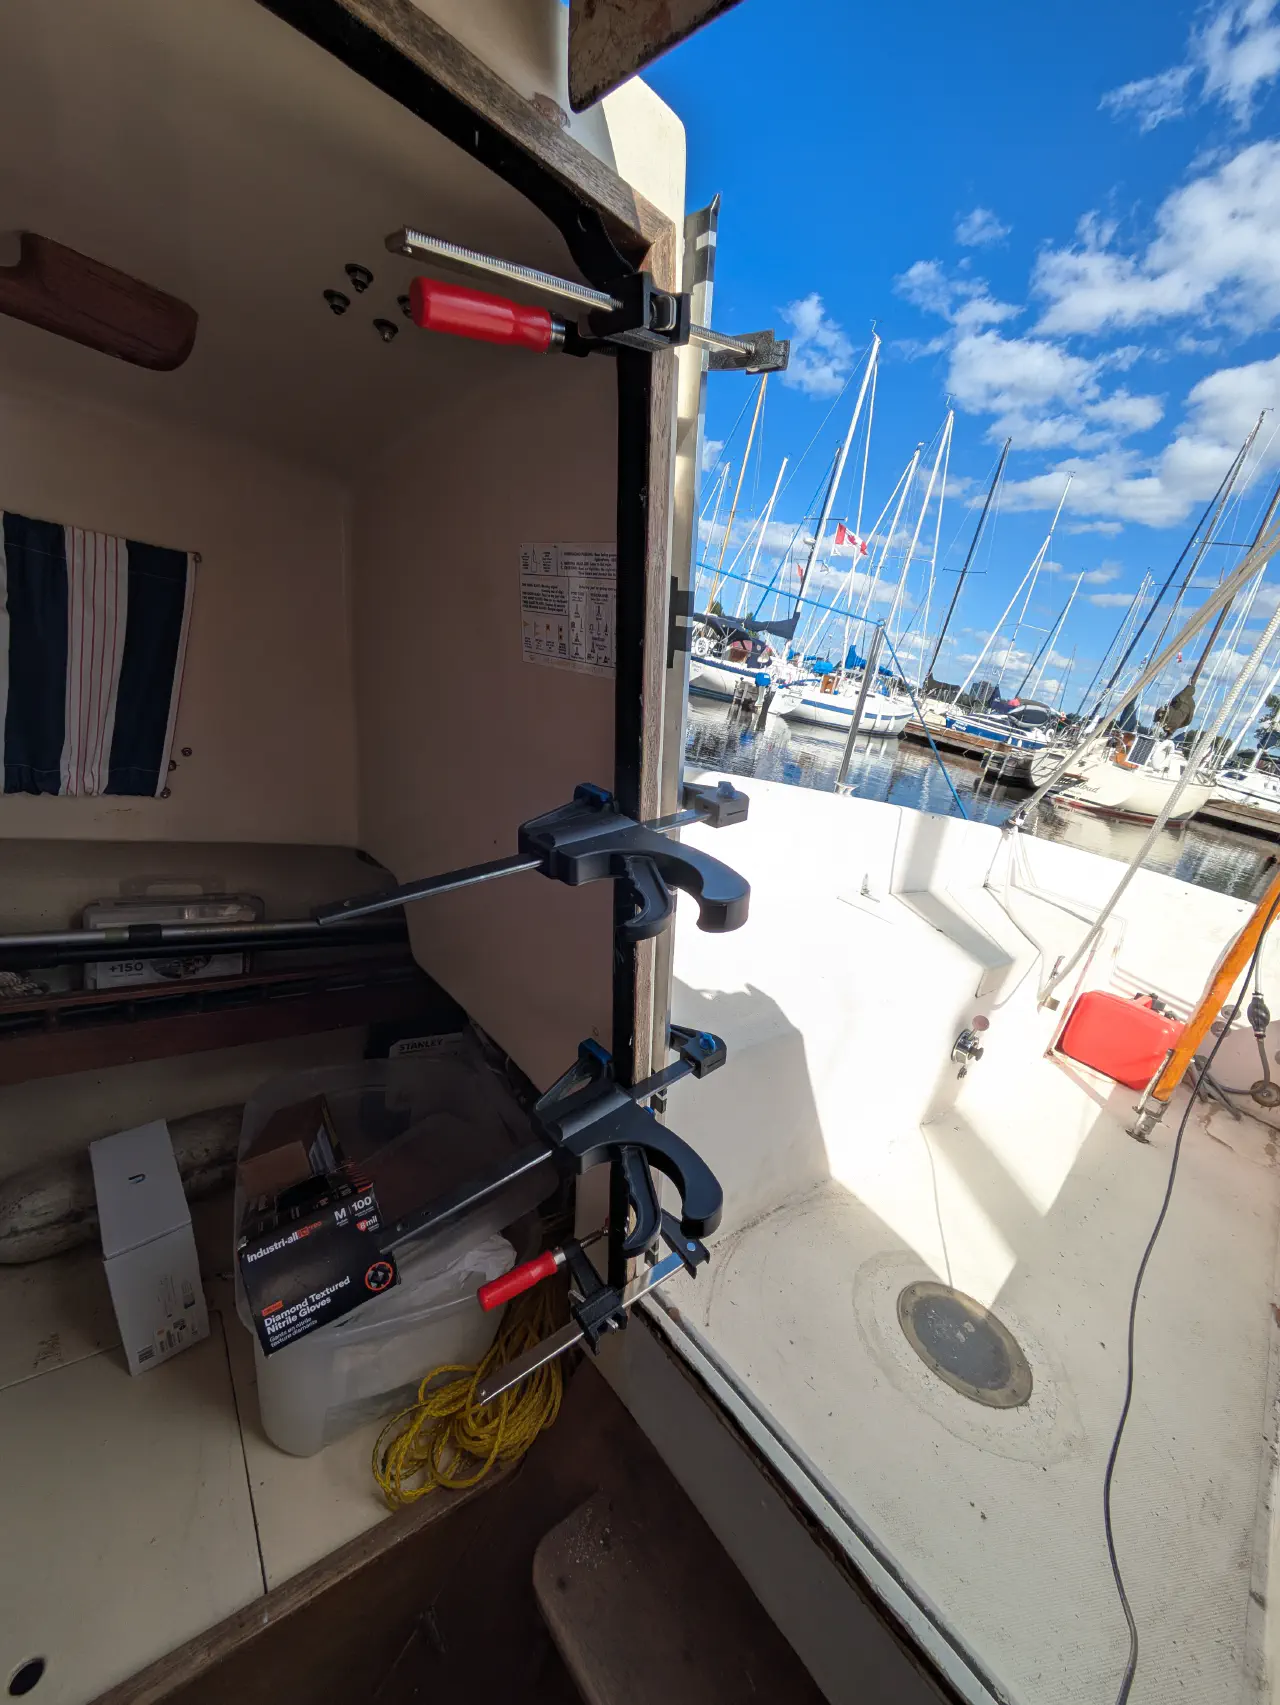
Transferring the hole locations to the flatbar was a bit fiddly. I used a combination of marking using the original trim as a template, and a session of dry-fitting to make sure I marked the right locations. At the same time I also marked some of the shaping I wanted to do like where I wanted rounded corners. The flatbar isn’t exactly the same size as the original trim, so some adjusting was necessary.
Once I had sufficient notes, I took everything back home and placed the final holes with the drill press.
A couple notes:
- WD-40 is a perfectly good cutting fluid for aluminum and it smells good.
- Center drills / spotting drills will go a long way in getting accurately located holes.
- Do you know how to file a tangent corner? Blondihacks actually has an excellent video1 on the matter.
- While you can cut aluminum with wood tools, I strongly recommend you get a proper set of chamfer bits. I splurged for a set of Accusize zero flute chamfering bits and have zero regrets.
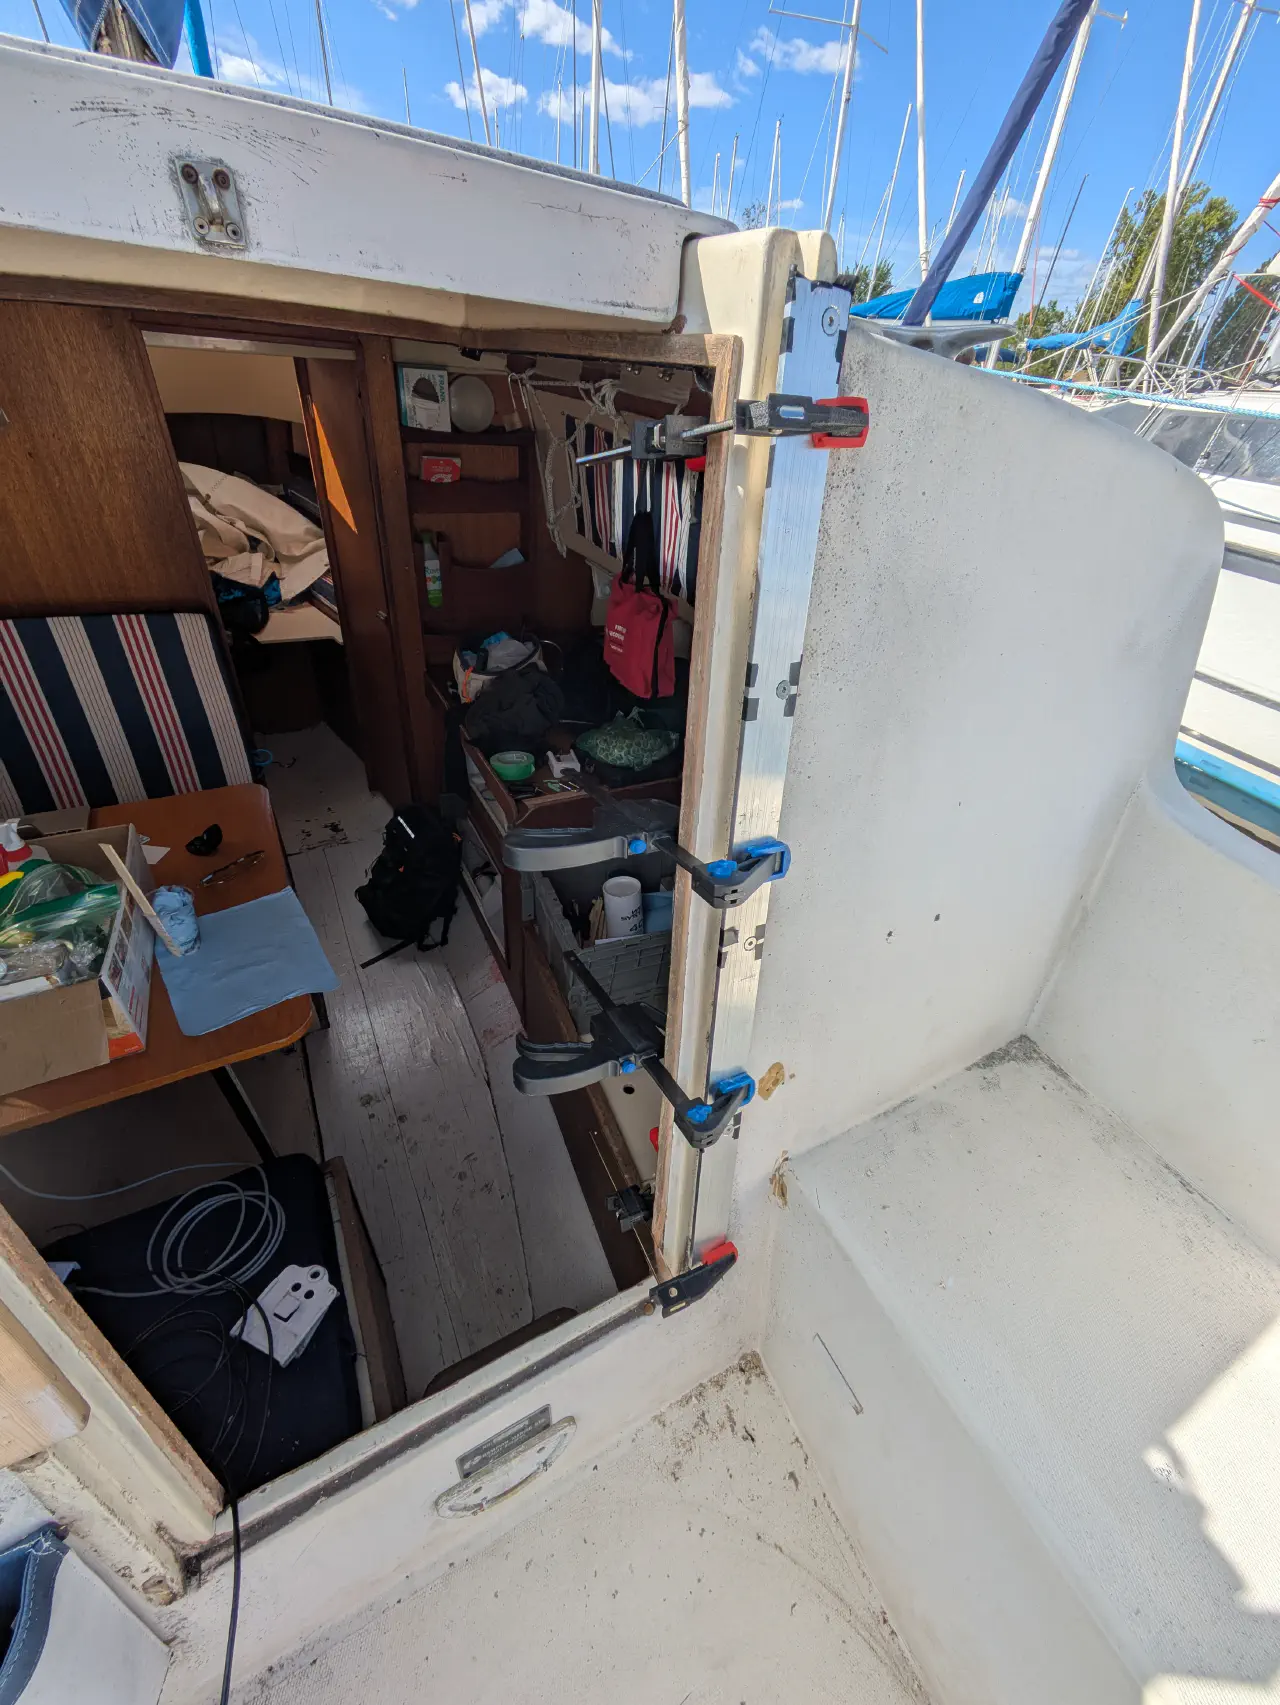
The real challenge was installation. It’s just fiddly and unless you have a million clamps you may not be able to do all that many pieces at a time. The name of the game is release, you don’t want to glue the strakes to the boat. That’d be awkward. Spend some time on prep, and ideally try out your products and solution off the boat first.
Prep is everything
This can’t be overstated. Before you get started make sure all your metal hardware is immaculate. I made sure all metal was free of grease using dish soap. Once that’s done, clean the fasteners some more with acetone, then wash and displace any remnants with isopropyl alcohol. You can do this in advance at home and stage the cleaned fasteners in zip-loc bags. If possible handle things with disposable gloves.
Surface prep is similar. The holes were sanded, blown off, cleaned with acetone, and washed with isopropyl alcohol.
For ensuring release in case the epoxy squeezes out when inserting the coils, my prep involved using electrical tape to cover large areas on the aluminum flatbar. Fasteners were sprayed with mold release, but shop wax could also be adequate if not better.
Go time
For lining things up what I did was assemble everything: fasteners through the flatbar, helicoils over the fasteners. I mixed some 105 and 205 and colloidal silica to peanut butter consistency and squirted it into the holes with a snipped zip-loc bag. Insert the flatbar contraption, clamp, and deploy furious prayer.
I waited for the epoxy to go just past green stage so that unfastening would not break the epoxy bond, then removed the fasteners from the coils. I’m not going to lie. Glue is supposed to glue, so I’m always impressed at how easy it is to remove things that were sprayed with mold release.
Be sure to wait for full cure before you re-attach the strakes.
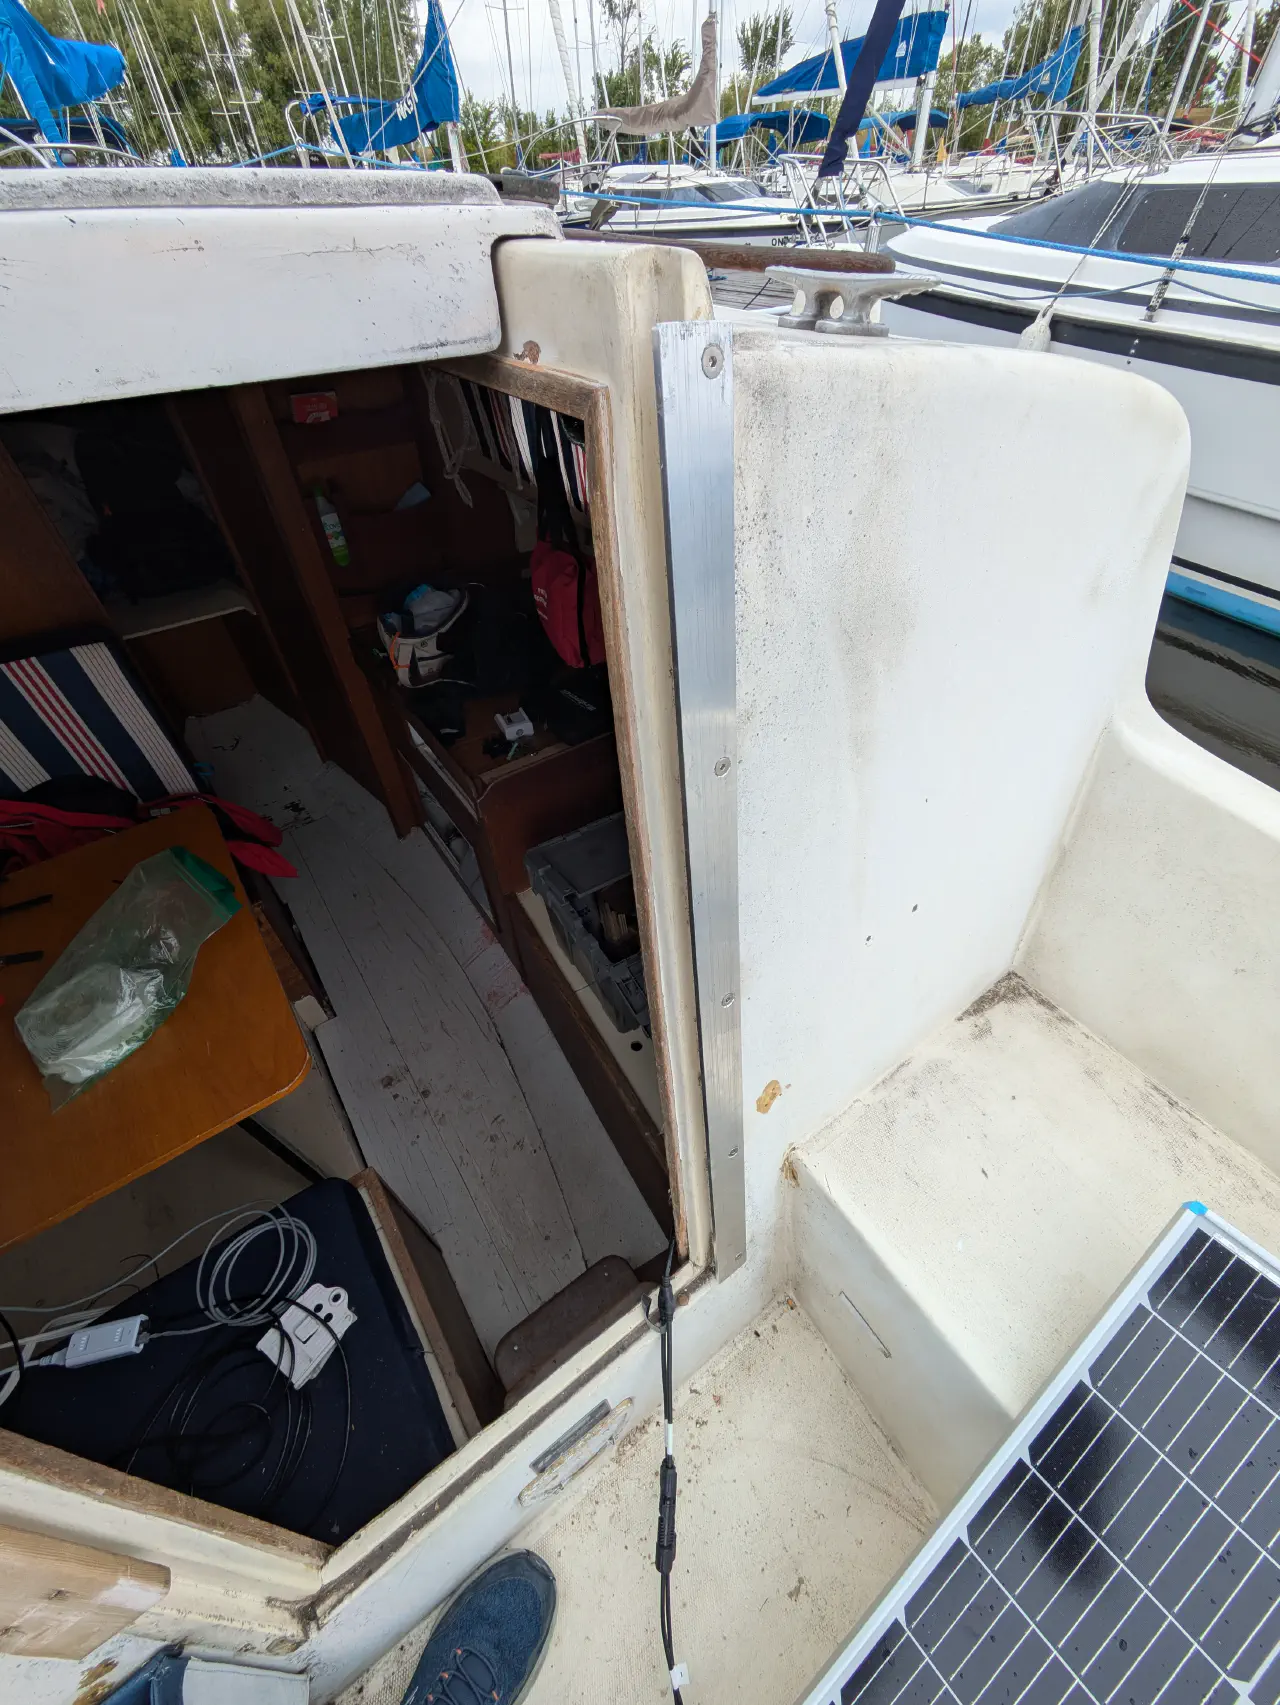
Final installation
One thing that annoyed me was that I couldn’t find helicoils in 316. That’s not very surprising, and 18-8 is perfectly fine for a river sailor like me. Nevertheless, you must use sealant to prevent water ingress. In my case I made a donut of butyl around each fastener and added a small rope of the stuff between the 316 fastener and the chamfered hole in the flatbar. This helps a bit to separate the dissimilar metals and prevents water ingress down the threads. I didn’t use threadlocker, but Loctite blue may have been a good idea. I don’t know if thermal cycling will loosen the fasteners over time.
Anyway, great success! No more sanding and varnishing! Next up is replacing the washboards with high-density polyethylene (yes, cutting board) and the handrails with stainless!
-
Dunki, Q. [Blondihacks]. (2025, March 15). Beginner’s Guide to Filing [Video]. YouTube. https://www.youtube.com/watch?v=G6gHxt-abQ0&pp=ygUSYmxvbmRpaGFja3MgZmlsaW5n ↩︎